swittest frontend
swittest is available as a web service with a nice UI to interact with.
1. Settings
The settings screen allows you to configure the swittest web service.
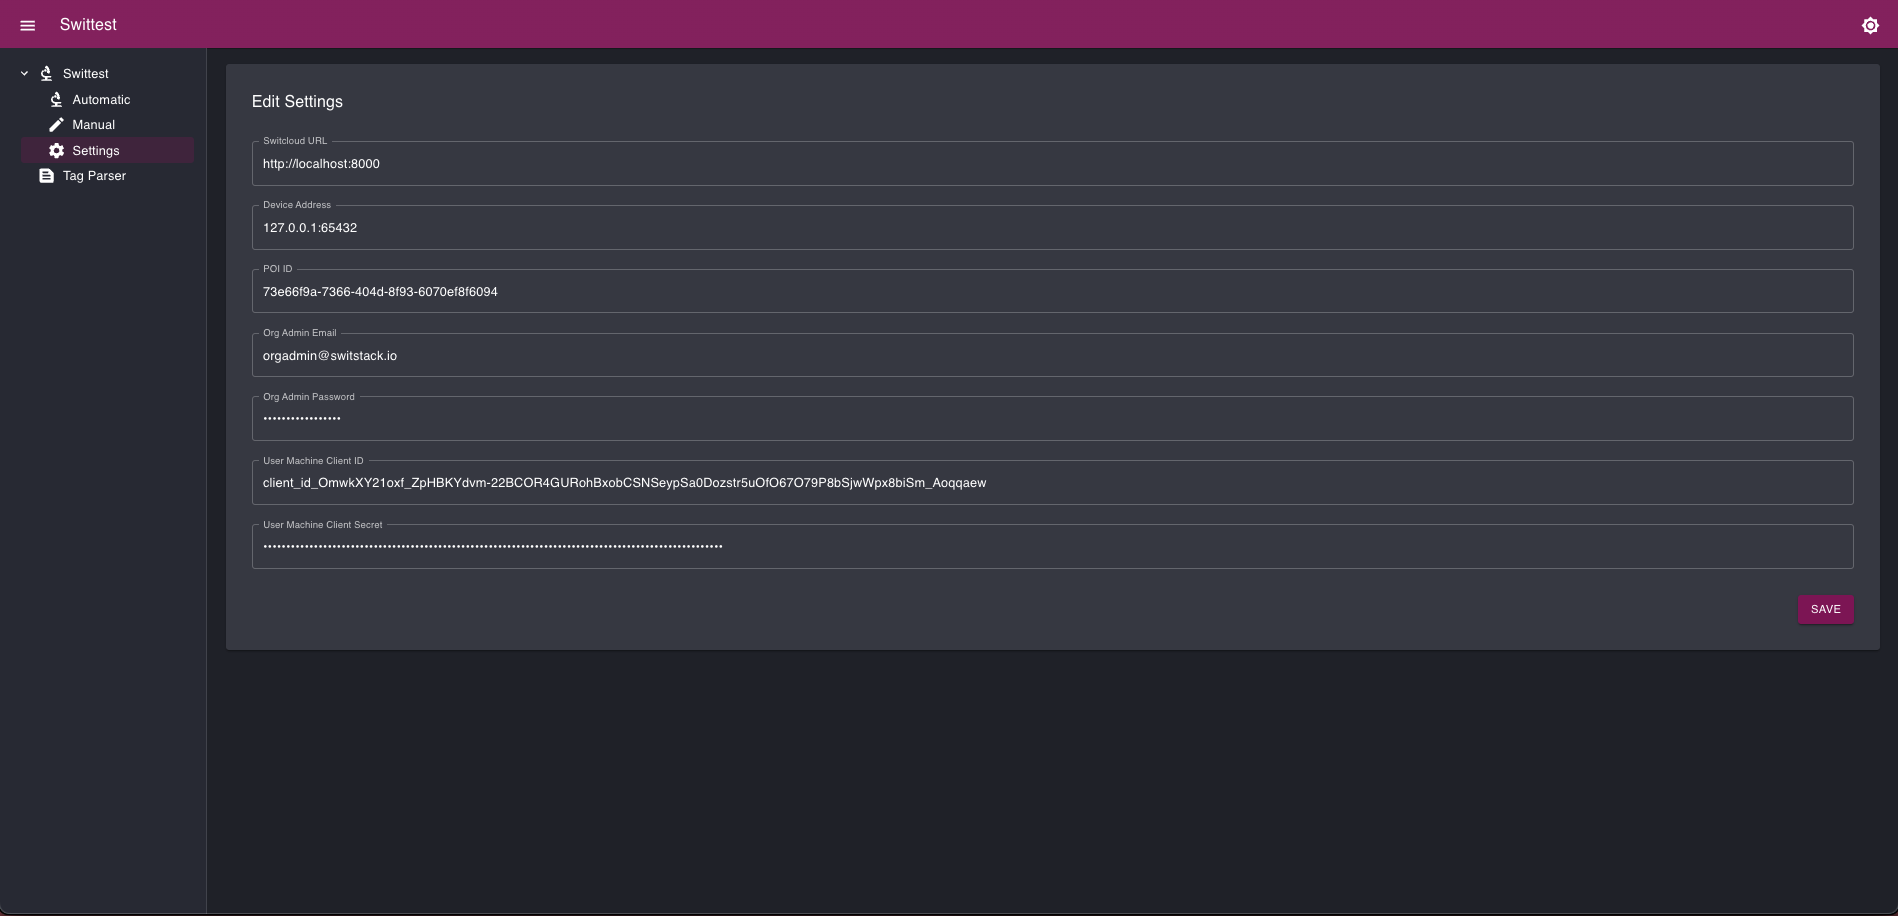
The settings include:
- Credentials to access the service (frontend + device);
- The terminal ID (POI ID).
2. swittest
2.1 Automatic mode
The automatic mode allows you to run test plans automatically. Test plans are pre-configured with the latest EMVCo and scheme specifications.
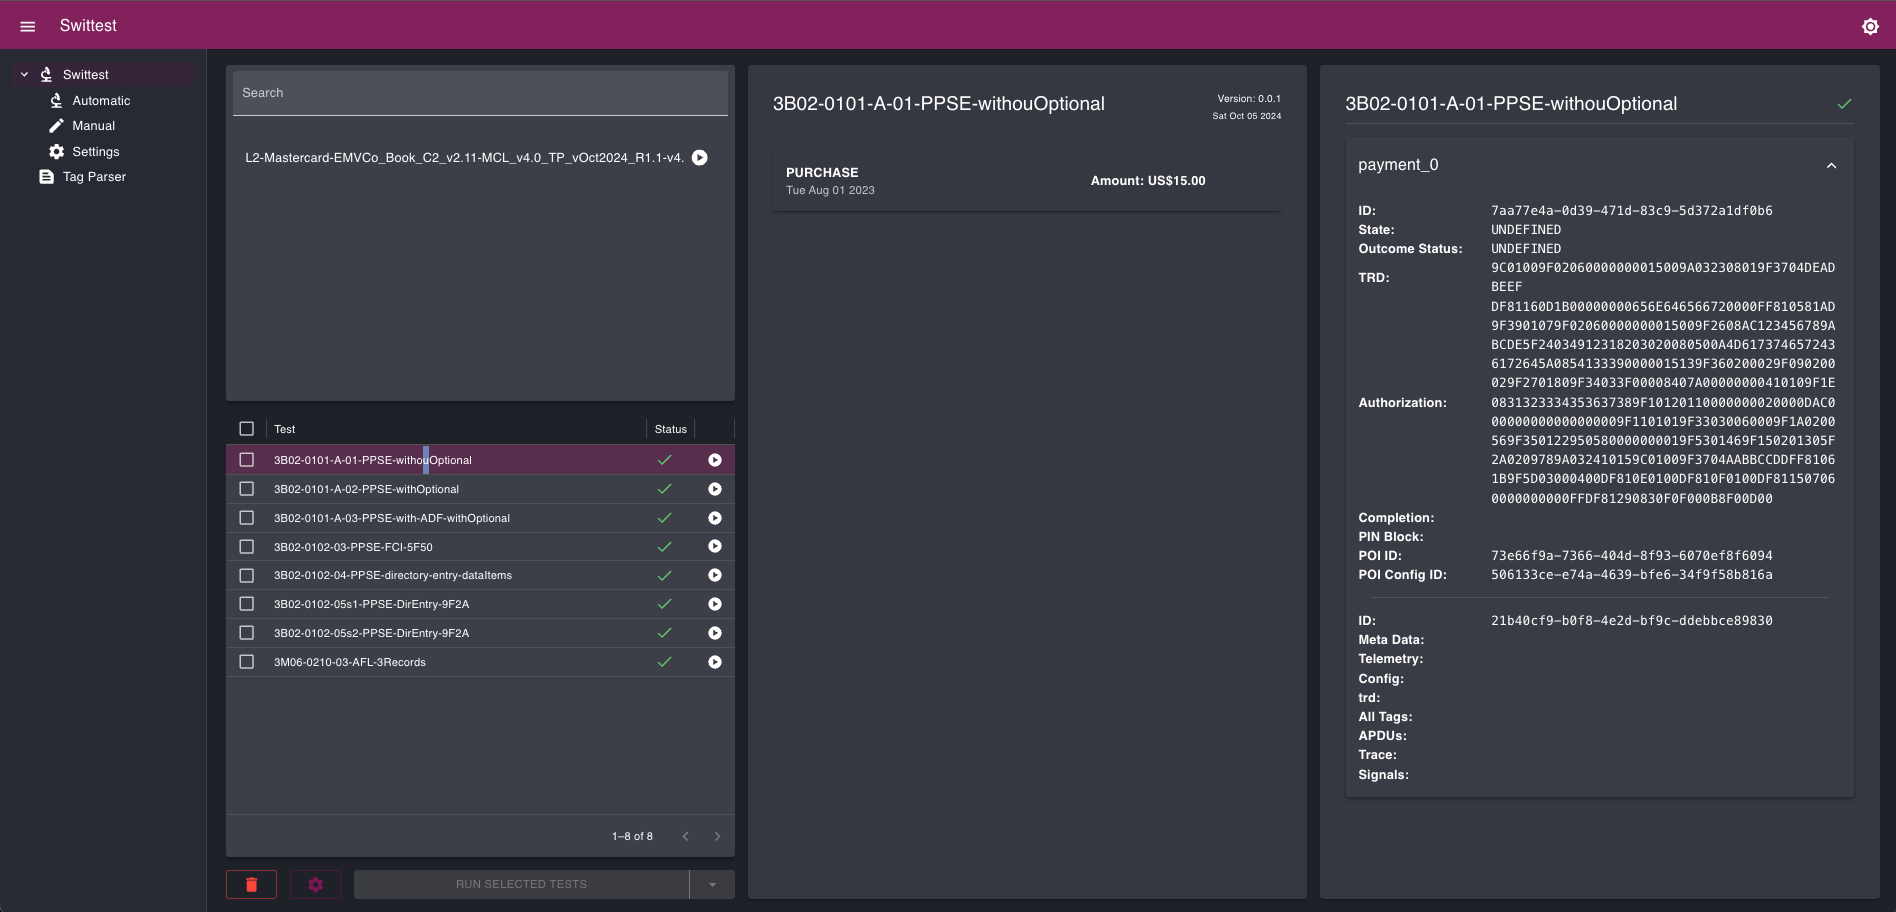
The purpose of the automatic mode is really to perform regression testing quickly. You can run an entire test suite by clicking the "Play" button () next to the test suite name.
But when needed, it also offers the necessary flexibility to:
- Run a single test;
- Run a selection of tests (contiguous or non-continguous);
- Only run previously failed tests (in a selection);
- Only run the tests without a verdict (in a selection).
The column at the center shows the test information:
- Test name and version;
- Test description;
- The actual payments/transactions data (TRDs mostly).
The right-hand side colums show the test results.
2.2 Config
The config page is like a local store where you can import or create your own set of configuration files.
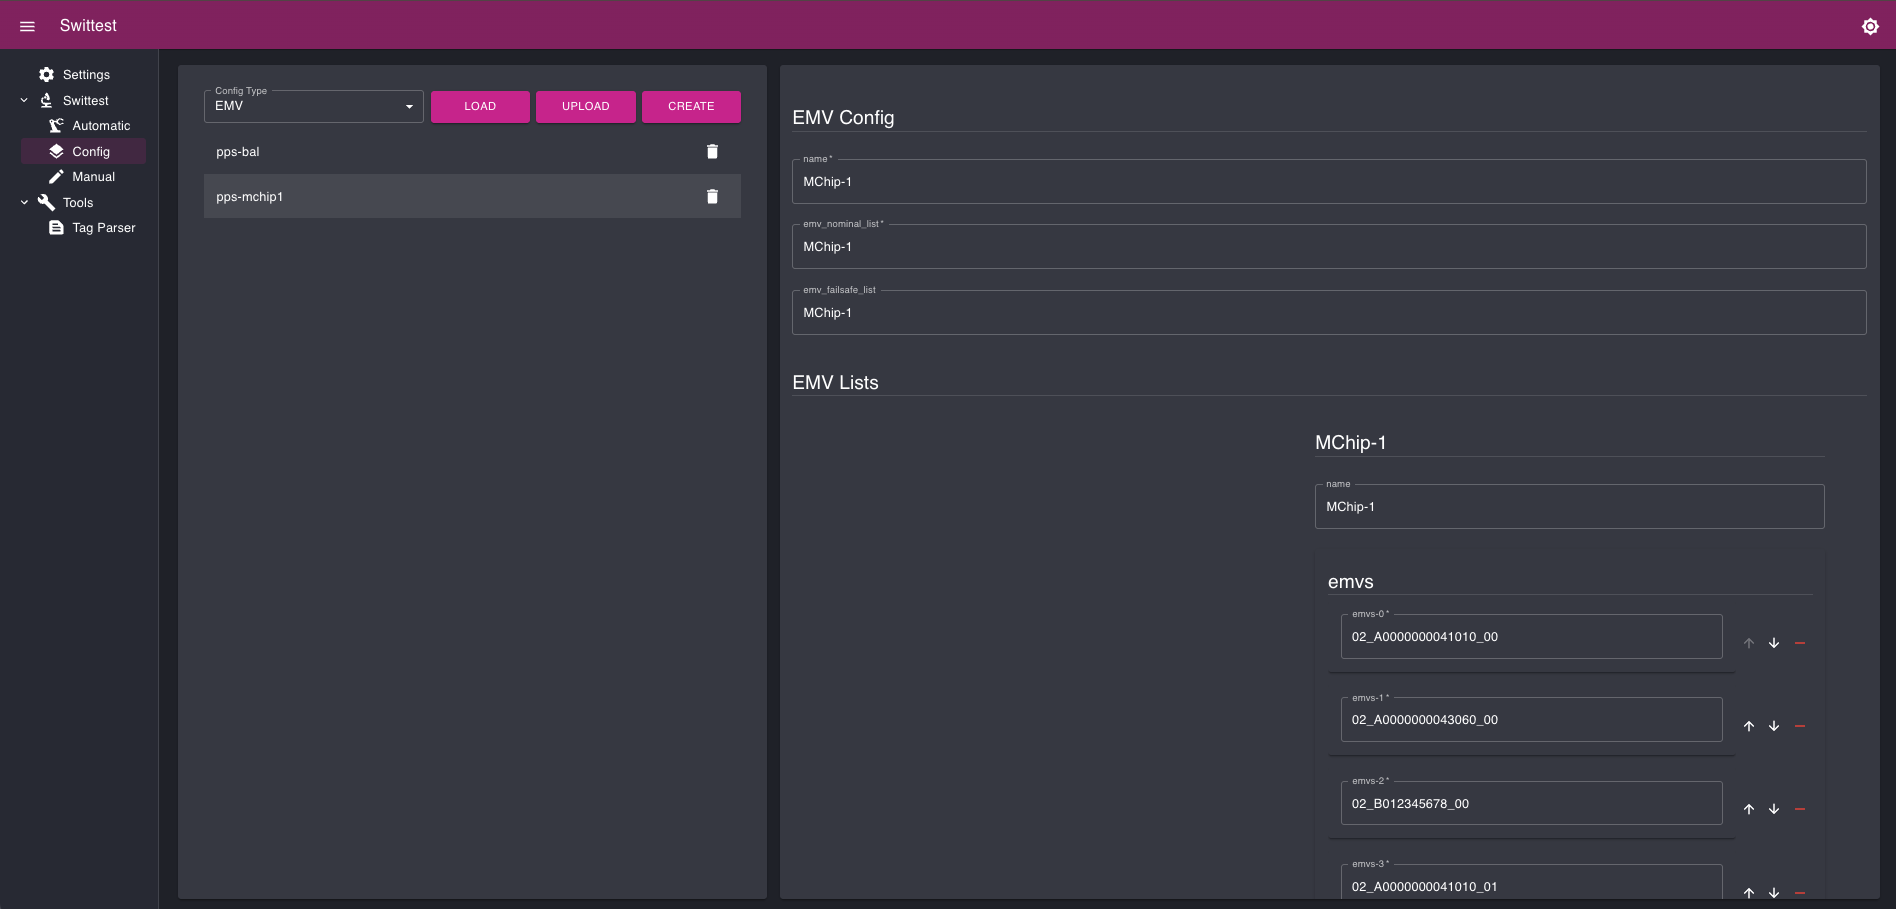
The supported configuration files are:
- EMV (combinations lists);
- CAPK (EMV public keys);
- CR (revocation lists);
- VCard (virtual cards).
You can either:
- Load configuration files from our own storage (the one we use for automatic testing) by clicking on the "Load" button;
- Import configuration files from your computer by clicking on the "Upload" button;
- Or create your own configuration files directly in the graphical interface by clicking on "Create".
2.3 Manual mode
The manual mode is an open world. You can create your own test suites, your own tests cases and run them.
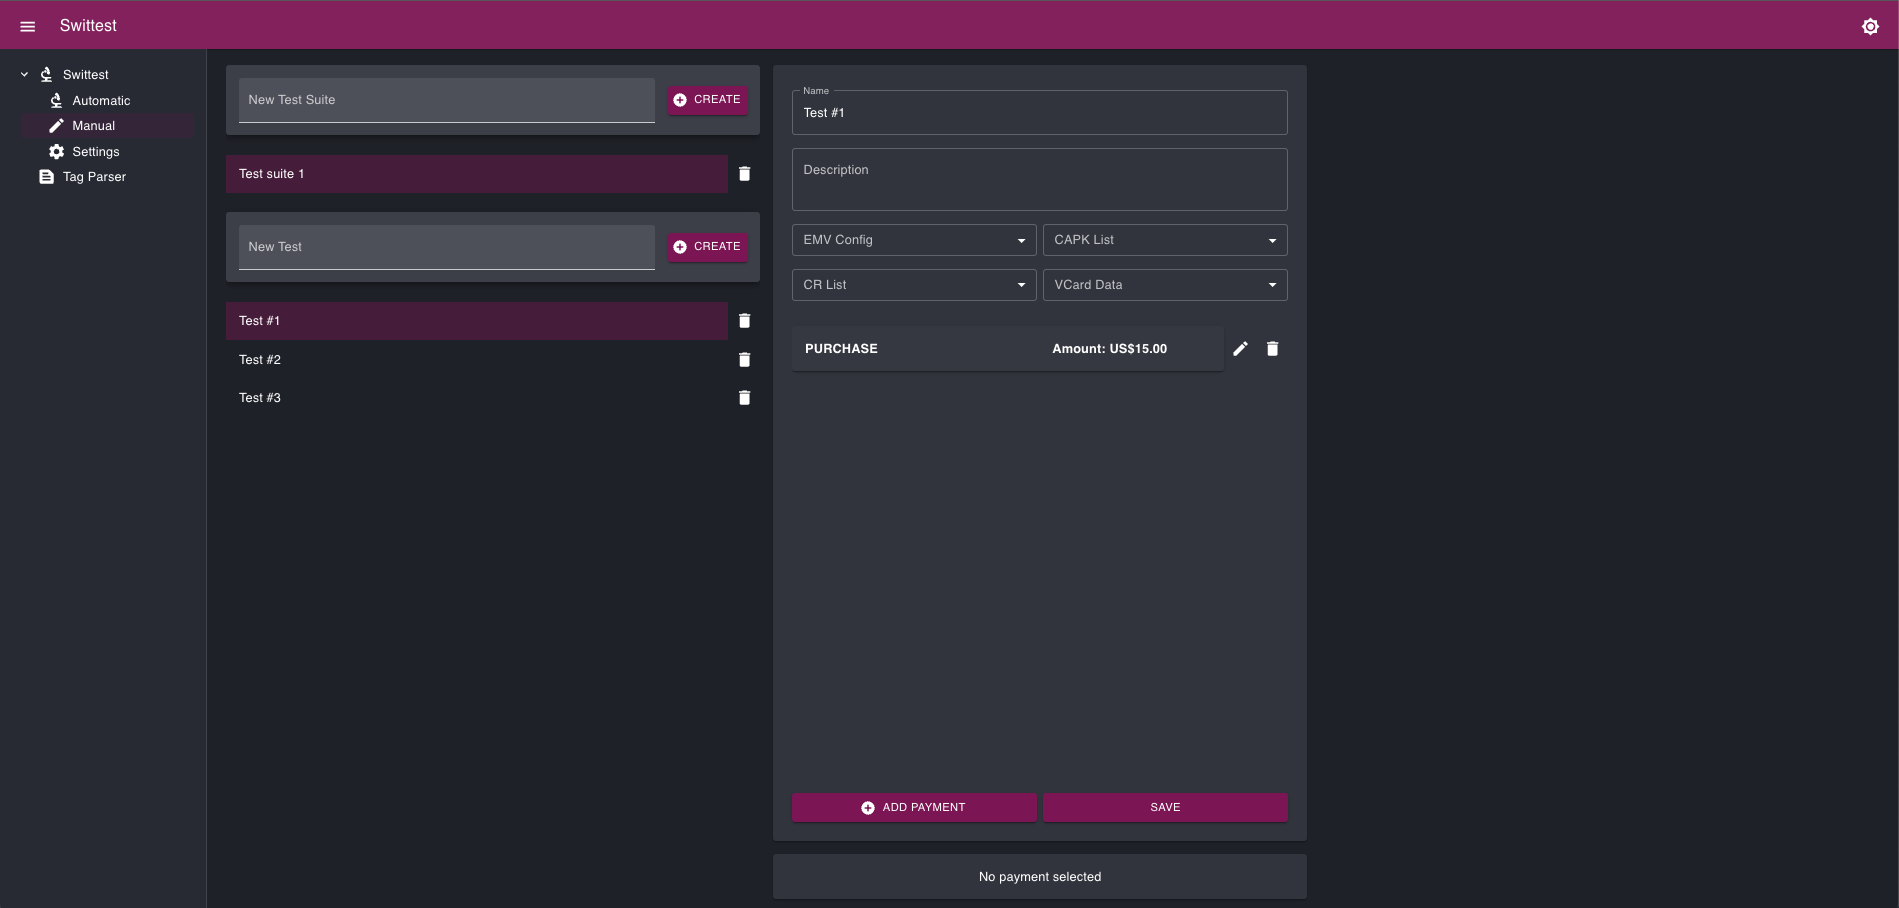
It comes with the same interface and the same execution features as the automatic mode (selection, run failed tests, run tests without verdict, ...).
2.3.1 Test Creation
To create a specific test, you need at least an EMV configuration, public keys (CAPK), and test definition. The easiest approach is to use an existing test/configuration from the "Automatic" page as a template.
2.3.2 Test Import
Click the "+" button to add a test. Then, import an existing test from an bundled test suite. You can then edit the imported test using the "Pencil" tool to change its name, amount, etc.
2.4 Runing a Transaction
Warning
Before running one or several test(s), make sure the test application is running and is connected to Swittest.
2.4.1 Single Test
To run a single test:
- Place the cursor over a test and click it.
- The selected test will turn gray.
- Information about the selected test will appear on the right side of the screen.
2.4.2 Multiple Tests
You can select multiple tests by checking the box next to each test name. Run the selected tests by clicking RUN SELECTED TEST (#), where # indicates the number of selected tests.
Note
# indicates the number of selected tests.
Information
Clicking the cog icon allows you to filter tests (e.g., all tests, failed tests only, or not executed tests). You can also execute the same tests multiple times (Loop tests).
2.4.3 Results Details
Once a test is executed, the result will be shown in the right-hand column of the page.
Whenever you see an "Eye" icon you can click it to expand and view tags or other details.
3. Toolbox
The toolbox is a set of tools every EMV / payment application develop needs. Rather than switching from tool to tool or website to website, we centralized what we know is necessary into a single place.
3.1 Tag parser
The tag parser allows you to parse the most common EMV tags and display them in a human readable format.
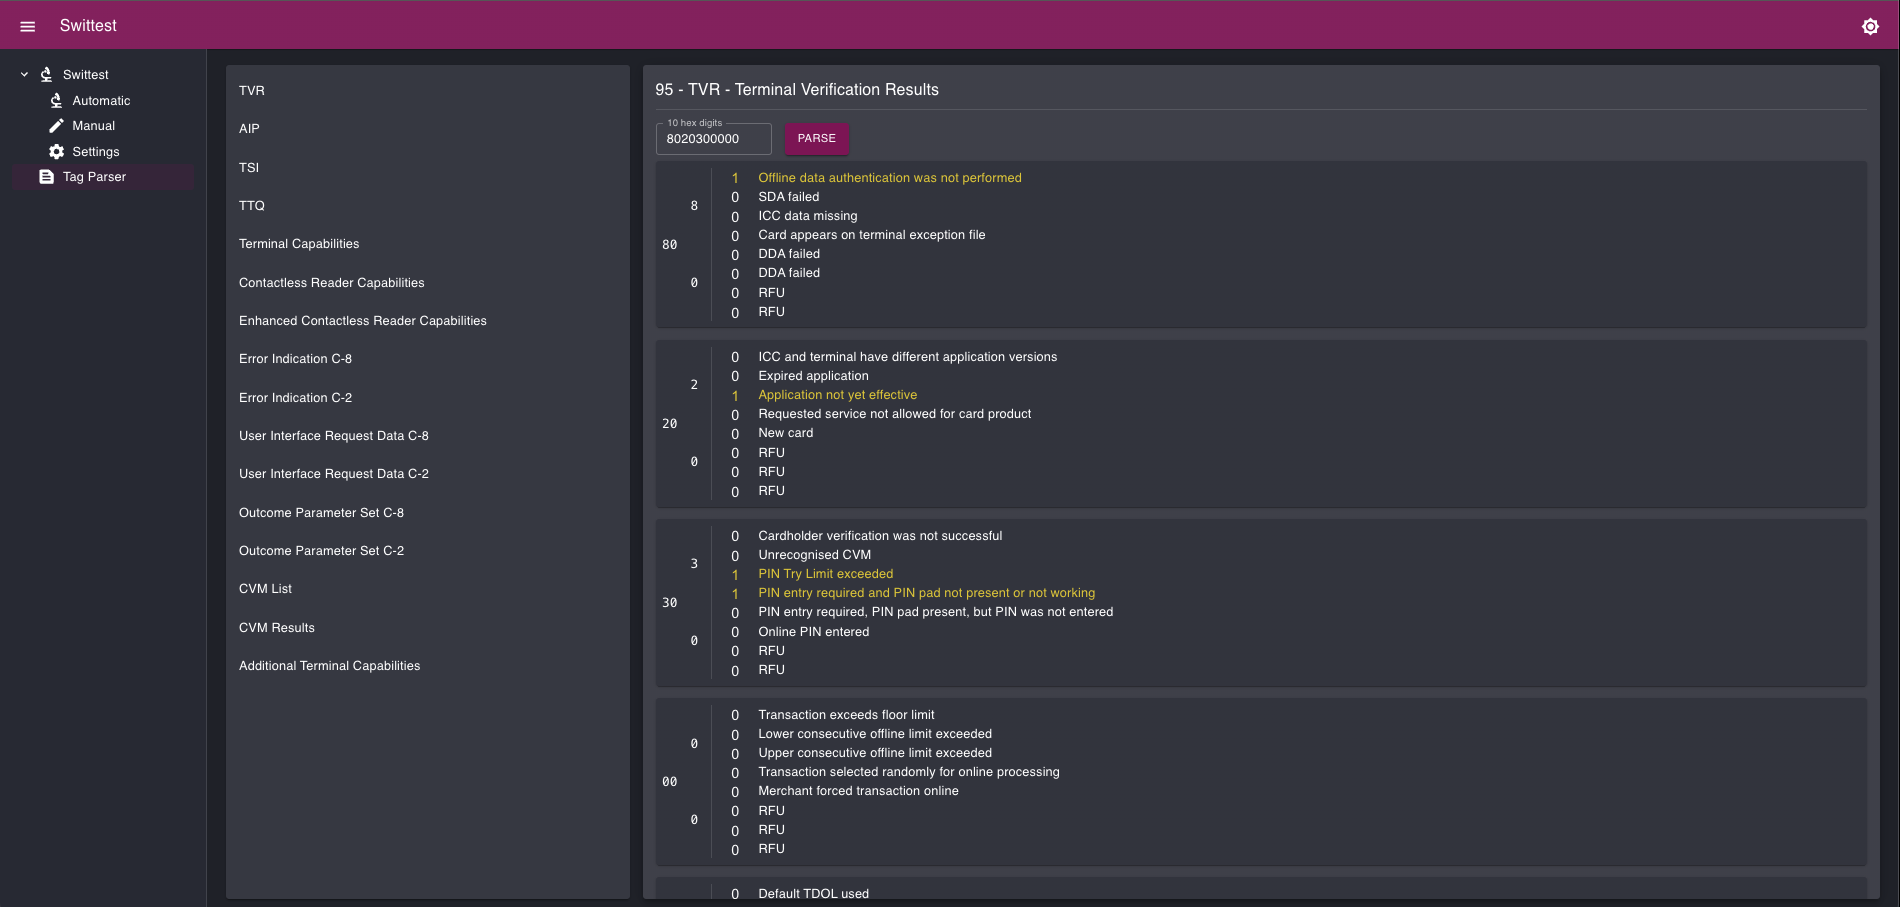
This tool is essential when needing to verify test post-conditions.